Hi there! This is your volleyball buddy. Today, let us learn how to get up from the couch and have a fun outing playing volleyball. And of course, sports are fun when the basics are known and there is a healthy competition. If you are a complete beginner or a seasoned player, this article is going to take you through the ingredients to start playing volleyball intently.
Let us start from the basics. What is this sport all about?
OBJECTIVE OF THE GAME
Simple. There is a ball, 2 teams, and a net. The first team to get to a predetermined number of points wins. Now the important question is, how does a team win points.
WHAT IS A RALLY?
Before knowing the winner, let’s understand what a rally is. A rally is nothing but a continuous series of hits on the ball between the opponents without stopping. The team that wins in a rally, gains 1 point. A rally can be as short as 1 shot or can be as long as 100 shots or more.
A rally in volleyball is slightly different from that in other net sports like tennis and badminton. Here, a team is allowed up to 3 hits of the ball amongst themselves before the ball is given to the opponent. Unlike tennis and badminton, where you only get one hit to send the ball or shuttle back to the opponent. So, the team’s players can pass the ball to each other to get into the best possible position of hitting the ball over the net towards the opponent. If the opponent is not able to return the ball by legal means, the team wins the rally and a point.
HOW TO WIN A POINT?
The rally keeps on going until both teams keep returning the ball legally (see below) to the other side. As soon as a team is unable to return it, the rally ends and a point is awarded accordingly. The first team to reach the target number of points wins and gets a treat from the losing team. (this is not a standard rule but I don’t understand why it isn’t!!)
Here are the legal means of returning a volleyball:
- The ball should be returned over the net and should not touch the groundoutside the bounds of the opponent’s court. If the ball is met by the hands (or body) of an opponent, the rally continues. Otherwise, if the ball touches the ground inside the court (falling on the line is also counted as in), the rally ends, and the opponent loses that point.
- There should be maximum of 3 hits by the team before returning. Any more than this will lead to the rally ending and a point being given to the other team.
- No player can touch a ball immediately after they have hit it. If a player touches the ball two times without anyone else touching in between, it leads to a foul and a point being awarded to the opposing team. The rally ends there.
BASIC FOULS
Here are some basic fouls that you should keep in mind before starting your volleyball journey
- Touching the net while hitting the ball
- The ball should not be in contact with your hands for too long. If it appears like you are catching the ball and then throwing it, it is known as lifting and is called a foul.
- Same player hitting the ball twice in a row.
- Reaching under the net to the other side of the court
- Hitting more than 3 times before sending the ball over the net to the other side.
HOW TO HIT THE BALL?
Let us talk about how to make contact with the ball using your hands and arms. You will encounter various situations in which to hit the ball, and your hitting style will vary based on them. Let us start with some common scenarios. For in depth tutorial on how to hit a ball in volleyball, check out this “internal link”.
Scenario 1: The ball is over your head, and you need to hit it with one hand
Raise your arm, bend your elbows but not so much that you can’t reach the ball over you. Now, with your fingers spread out wide, hit the ball firmly with the palm of your hand. Hit the ball in its centre so that it follows a trajectory over the net. Make a follow through post hitting the ball such that your arm is extended towards the net. Use this technique to serve a ball overhead or to hit a slow ball in the air over your head. If the ball is coming at you fast, as a beginner, you should not use this technique. To learn how to serve a ball in detail, check this out – “internal link”.
Scenario 2: The ball is coming towards you at a fast pace at waist height
Remember your objective. It is to keep the ball in play. Widen your stance, bend your knees and extend your arms in front of you and clasp your hands together as shown in the figure below. The elbows should not bend and keep your forearm tight. The goal is to hit the ball from your forearms (the area between elbow and wrist). Most important is to make sure that your forearm is pointing upwards and not sideways. You have to get clean contact with the ball for best results.
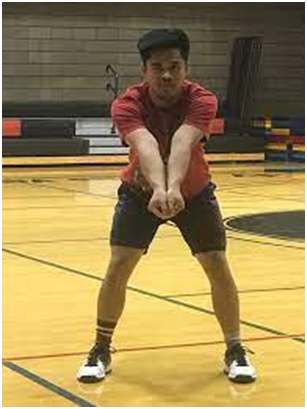
There are two ways you can clasp your hands:
- Make a fist with one hand and wrap the other hand around it.
- Place one hand’s fingers over another forming a V shape that points away from you. Bend both hands at the knuckles and use both thumbs to cover the palm. The thumbs are adjacent to each other with both of them pointed away from you. (Refer to the image above)
But do note that your forearm should be pointing upwards however way you clasp your hands and the elbow should be locked in extended position.
Finally, when the ball comes, just use the forearms to make contact with the ball to send it back or to give it height for another teammate to hit. You don’t have to hit the ball hard or follow through, you just have to place your forearms like a wall to change the direction of the ball. However, if the ball has very slow pace, you may need to add some momentum to it by using your shoulders to move your forearms.
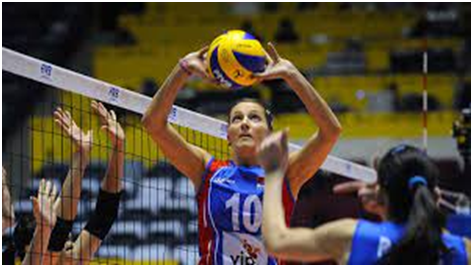
Scenario 3: You want to pass the ball to your teammate so that he can attack the ball to score a point
This is known as Setting the ball. You “set” the ball for your teammate to attack or spike it. This is usually the second hit in the 3 hits that your team makes to send the ball to the opponent. This touch is often very precise and requires a lot of practice. So don’t worry if you don’t get it right.
To perform a set, get into a good position to meet the ball slightly over your head. Now, spread your fingers out wide and form a triangle with your index fingers and thumbs. The ball will arrive in this triangle and your fingers will act like a spring to release the ball. You may also need to use some power from your wrist and by extending your arms. Make sure to not catch the ball, but to just absorb the impact of the incoming ball and send it back into the air in a continuous movement.
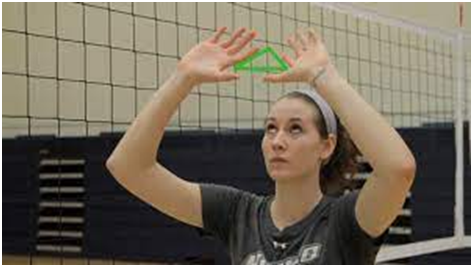
To learn how to set a ball in detail, check this out – “internal link”.
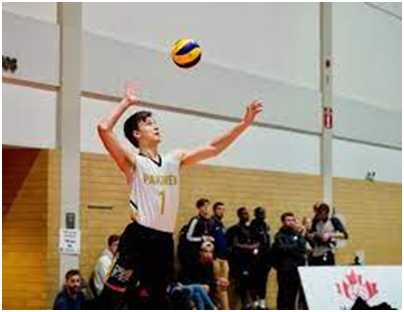
Scenario 4: You are attacking the ball to send the ball over the net at a fast pace
This is known as “Spiking”. This is usually the 3rd and the last hit before the ball should be sent to the opponent’s side.
The contact with the ball is the same as in Scenario 1. The only difference is that this time, you want to hit the ball after jumping with more power and contact the ball at an angle so that it goes down towards the ground in the opponent’s court. Most spikes involve a run up before the hit and for that, you run up in 2-3 steps towards your spike position and use your forward momentum to lift off from both legs together to jump and hit the ball. You need to jump in order to have your hitting hand above the net’s height, otherwise you will end up hitting the ball in the net and losing the point. To learn how to spike a ball in detail, check this out – “internal link”.
Let’s Play!
Follow these 4 steps in order while you are heading out to play a game for the best experience!
- Warm up
- Play
- Cool Down
- Basic Maintenance of equipment
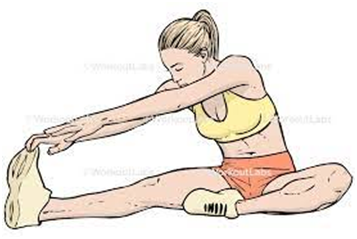
WARM UP
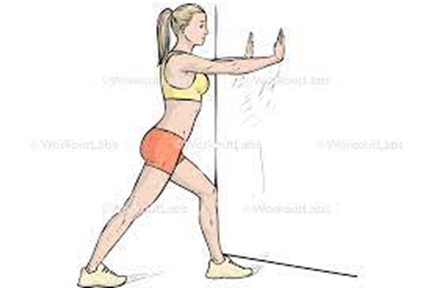
Warming up is one of the most important but forgotten activities while playing a sport. IT gets your body warmed up, increases blood flow and prepares your muscles for the strain that’s about to come. We all risk overstraining our muscles while playing. But this risk is a lot more when the muscles are not loosened up before playing. Playing on tight muscles and a cold body is one of the worst things you could do to your body and game performance.
Here is a short warm up protocol you should follow before each volleyball session. This can be completed under 5 minutes.
- Jog forward and backward – 30 seconds
- Arm circles – 10 each direction
- Jumping jacks – 20 times
- Body twists while jumping – 5 times each side
- Front lunges – 5 with each leg
- Side lunges – 5 with each leg
- High knees – 5 with each leg
Although this is not the most comprehensive warmup, it is more than enough to get you started. Remember, the goal is to do warmup consistently, not to do the perfect warmup inconsistently.
PLAY THE GAME (Beginners pay attention!)
The game starts with one team serving the ball to the other side and the other team now has to defend the incoming serve and return the ball in not more than 3 hits amongst themselves. If you are just starting to play, don’t worry about setting and spiking. Aim to not let the ball fall down and return to the opponent’s court. With time, you will start loving the game!
For more experienced players, the usual flow of the game involves a serve, passing the ball (Receiving the serve is called passing), setting the ball and then spiking it. The other team can have two responses. While the attacker of the first team is spiking, the players near the net jump to block the spike. If that is successful, the ball returns to the first team and they get 3 hits again. If the block fails, the second team has to defend the ball, set it and then spike it again. This goes on till the rally ends.
COOLDOWN
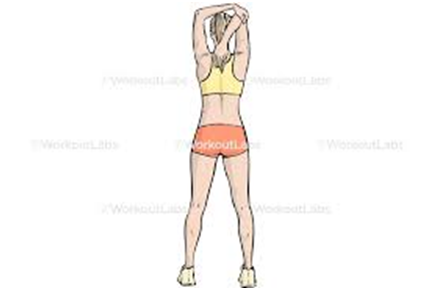
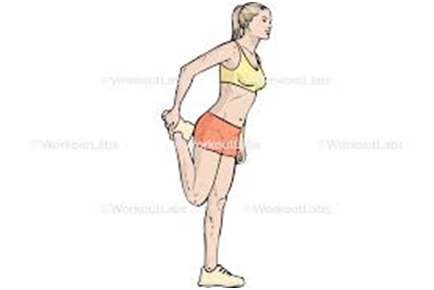
Cooldown is as important as warmup. When you finish playing, your heart rate is up, blood pressure is up and the muscles are pumped. Cooling down resets your body to pre-game status by restoring the heart rate and blood pressure to normal levels. The body temperature also drops. Once the body gets cold, the muscles get tighter and hinder body movement. To avoid this and retain flexibility, it is really important to stretch the muscles while cooling down. Here is a quick 5-minute routine to cool down properly.
- Shoulder stretch- 10 seconds each side
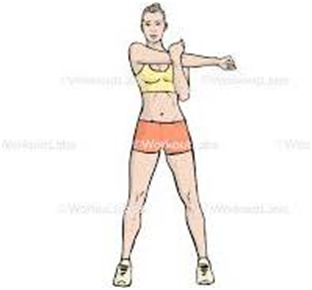
- Triceps stretch – 10 seconds each side
- Quad stretch – 10 seconds each side
- Calves stretch – 10 seconds each side
- Hamstring stretch – 10 seconds each side
EQUIPMENT MAINTENANCE TIPS
Assuming you liked to play volleyball and want to do it again sometime in the future, it becomes imperative to take care of the equipment just like you cooled down to take care of your body.
- Place damp shoes in the sun to dry naturally and get rid of the odor.
- Untie and loosen your shoes before removing them.
- Machine wash the clothes in moderate-cool water as hot water can reduce the clothes’ life.
- If the ball is moist or wet, use a dry soft cloth to wipe it clean.
- Store the balls in a non humid and well-ventilated space. Don’t place balls in contact with surfaces from which it can absorb moisture.
- Store the ball out of direct sunlight.
- Don’t use a dryer to dry the ball. The ball should dry off naturally after you wipe the water off with a cloth.
- Store the balls in moderate temperature, neither too hot nor too cold.
Different Volleyball Formats
There are two famous variations of volleyball based on where you play the game:
- Indoor Volleyball
- Beach Volleyball
While there is no difference in the fundamentals, there are some key differences to take note of. We will learn about both. Let’s start with the indoor variant.
Indoor Volleyball
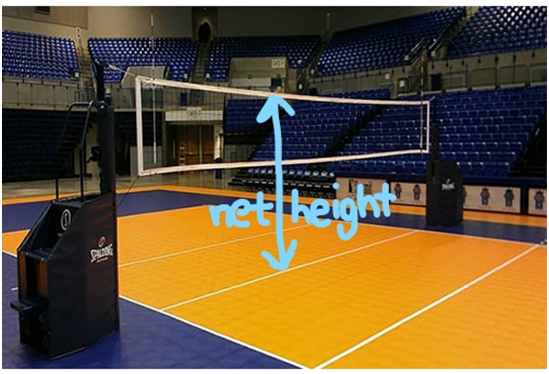
This usually is played in a gym with PVC flooring, with 6 players on each side of the court. The net is approximately 8 feet high for men and 7 feet 4 inches high for women.
HOW TO PLAY INDOOR VOLLEYBALL
The scoring is done in 5 sets with the first four being 25 points each and the last one being 15 points. The first team to win 3 sets is declared the winner.
What do you need to play indoor volleyball?
- Indoor Court with volleyball Net and court markings.
- Clothing and Shoes- Don’t wear running shoes. You can wear cross training sport shoes, or even badminton and basketball shoes to start with. It is recommended to go for dedicated volleyball shoes in the long run but don’t worry about it at all to begin with. Just go and play. Wear any comfortable sports t-shirt which lets your arms move freely and go for sports shorts. Spandex shorts are even better but won’t make much difference when starting out.
- Ball- Here is one place you will have to have a dedicated (volley)ball. It is a cheap item to buy, so just go ahead and try one.
- Teammates. Volleyball is a team sport. Ideally, 12 players are needed for a game but if you are just a beginner and can’t call so many people, don’t worry. You can start playing with as low as 2-3 people on each team as well.
POSITIONS IN INDOOR VOLLEYBALL
Like any other team sport, volleyball has positions so that the team can benefit from individual strengths and minimize the impact of individual weaknesses. The key positions are:
- Libero: The defensive specialist in the team who only plays behind the 10 feet line and is responsible for leading the defense of the team against opponent’s attacks.
- Setter: The setter is the specialist who is responsible for setting the ball for hitters to spike.
- Hitter: The hitters are the attacking specialists. They are further categorized into Outside Hitters (left side hitters) and Opposite Hitters (right side hitters).
- Blocker: They are usually the tallest player in the team and stand near the net to block spikes from the opponents. A successful block sends the ball immediately back into the attacker’s court.
- If you are a complete beginner and don’t know where to play, here is a quick guideline to organize your team for a match:
- Appoint an agile and short player as the libero for your game.
- Appoint the person with the best ball control and game awareness as the setter for your game.
- Appoint a tall and powerful player who can jump really well as the blocker for your game.
- Appoint a tall and powerful player who can hit the ball well as the hitter for your game.
Beach Volleyball
Beach volleyball is played by two teams with two players each on a soft sand court divided by a net.
HOW TO PLAY BEACH VOLLEYBALL
The scoring is done in 3 sets. The first two sets are played till 21 points and the third one till 15 points. The first team to win 2 sets is declared the winner.
What do you need to play beach volleyball?
- Soft sand court on the beach – This court is 3 feet shorter in length on each side as compared to the indoor court. Most beaches have dedicated places for beach volleyball, so it should be easy to find one and play.
- Net – the height of the net is same as in indoor volleyball. You can use the same net for both.
- Clothing and shoes- Most clothing and shoes tend to accumulate sand in them while playing. Hence, beach volleyball always uses minimal clothing. It is usually played barefoot. But if the heat gets too much or you want some protection on your feet, you can go for beach volleyball shoes or sand socks. Females usually wear swimsuits and men usually wear loose tank tops and shorts. But it is up to you to choose your own comfortable clothing. Just make sure that you can move easily in them, and they don’t trap a lot of sand while playing.
- Ball – Of course you will need a ball to play. Beach volleyballs are different from indoor ones. These are lighter, softer and slightly bigger. The ball floats more than the indoor one.
- Teammates – Here you need a total of 4 players only to have the best game of your life.
- Personal Care – Spending so much time in the sun calls for good sunscreen and good sunglasses. Try to have these in your arsenal before a game to have the best experience.
POSITIONS IN BEACH VOLLEYBALL
There are no specialized positions in beach volleyball. Both the players should be skilled in hitting, defending, setting and blocking. However, pro players usually specialize in defense or offense and form a complementary pairing. Note that communication between the two players is very important during the game since their duties overlap.
If you are a complete beginner, here are some guidelines to get you started:
- Initially try to play both offense and defence to understand your strengths and interests. Later on, once you get the hang of your inclinations, form a complimentary pairing.
- While playing, try to occupy the empty spaces on the court and keep moving depending on the game situation and location of your teammate.
- While serving, it is recommended to have the non-serving member stand near the net and while receiving a serve, stand in the middle of the court side by side.
Indoor vs Beach volleyball
The gameplay and rules are quite similar in beach volleyball. However, there is just one extra rule in beach volleyball. Players are not allowed to tip the ball over the net using their fingertips to earn a point. This is allowed in indoor volleyball.
Even though the rules are almost identical, the gameplay looks much different and slightly slower in beach volleyball. This is due to the fact that there are only 2 players in a team in beach volleyball and the sand makes it harder to move and jump. Also, environmental conditions like the wind and sun make the game challenging. Both variations have their own sets of challenges, and it depends on the interest of different people.
Frequently Asked Questions
What are antenna at the 2 ends of the volleyball net? What if the ball hits them?
Antenna are vertical rods placed on the net in indoor volleyball to mark the side boundaries of the court at the net. Any ball which goes over the net from inside the antenna is counted as in play. If the ball hits the antenna, it is considered out of play and the point is awarded to the other team.
If the ball falls on the line, is it considered in or out?
If any part of the ball touches the line, it is counted as in play.
Can I use my feet to hit the volleyball?
Yes, you can. In fact, you can use any part of your body to hit the ball as long as the ball bounces back immediately.
What is the difference between Outside and Opposite Hitter?
Outside hitters generally hit from the left side of the court when in the front row whereas Opposite hitters usually hit from the right side of the court.
What is front row and back row in volleyball?
There is a 10 feet line on the court on both sides of the net. The zone between this line and the net is known as the front row and the zone between this line and the back line of the court is known as the back row. Typically, there are 3 players in each of the two rows. The players in the front row perform most of the hitting and all of the blocking. The ones in the back row defend the opponent’s attack and sometimes attack from the back. The back row players can only initiate their jump for attack from the back row.